No-API Server Service Connection
Official step-by-step guide to activate and verify your No-API Server connection, including success and failure checks plus local vs server benefits.
No-API Server Service Connection
Follow this setup to activate the No-API Server Service and keep your No-API automation stable in the cloud.
Video walkthrough
1. How to Activate the No-API Server Service
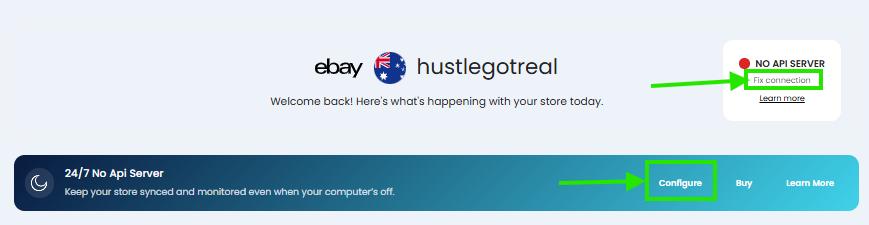
To activate the server:
- Go to Services -> No-API Server.
Or click on "Fix connection" or "Configure" in the Dashboard banner:
2. Activate the service by clicking on "Configure here" where it says "No Store Configured"
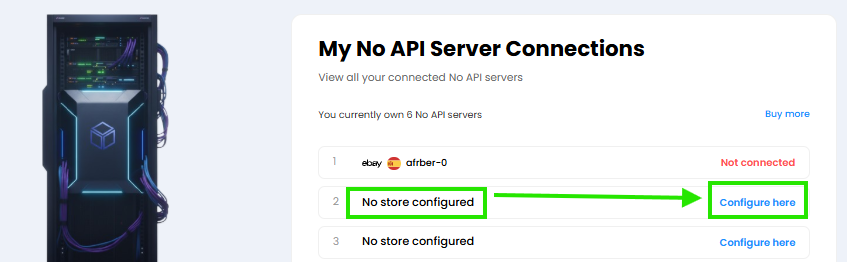

3. Once you click Configure here or open a server showing "Not Connected," you must:
Log in to your marketplace account inside the server session.
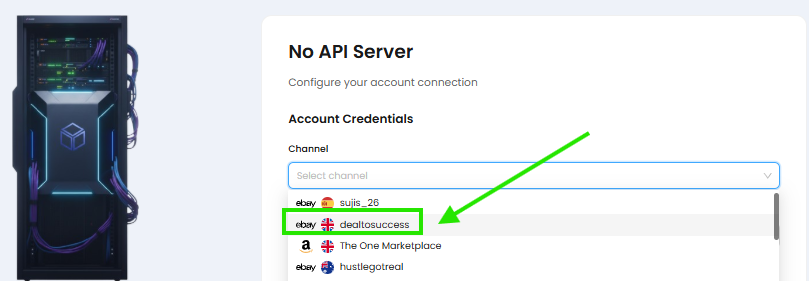
3.1 - Choose Your Channel
Select the store the server should be connected to. The dropdown will show your store name.
3.2 - Enter Your Marketplace Password
IMPORTANT
This must be your marketplace password, not your HGR password.
Examples:
- For eBay - enter your eBay password.
- For Amazon - enter your Amazon password.
This allows the server to log in to your marketplace inside the cloud environment.
HGR never stores this password directly; it is used only to authenticate the remote automated session.
3.3 - Click Save and Reset Server
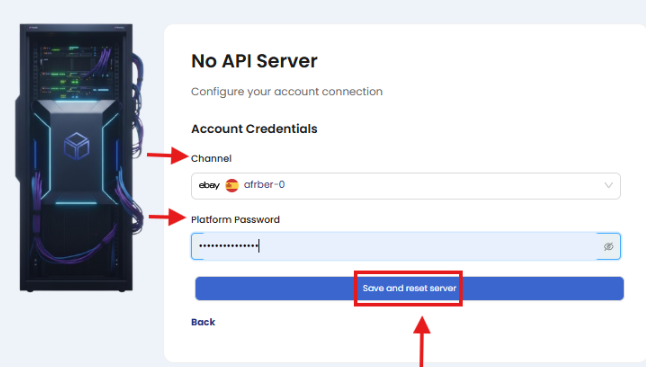
This does three things:
- Saves your server configuration.
- Restarts the server to apply settings.
- Initiates the login process inside the cloud session.
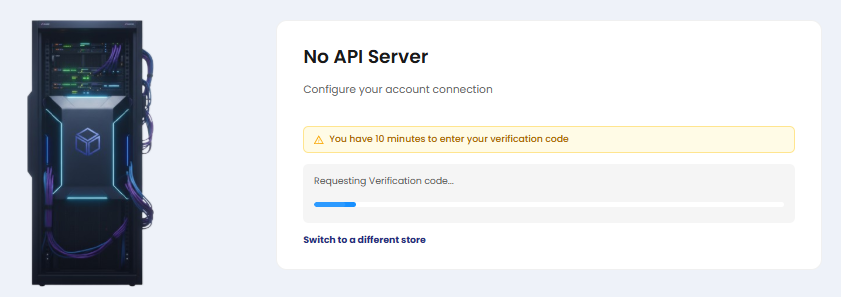
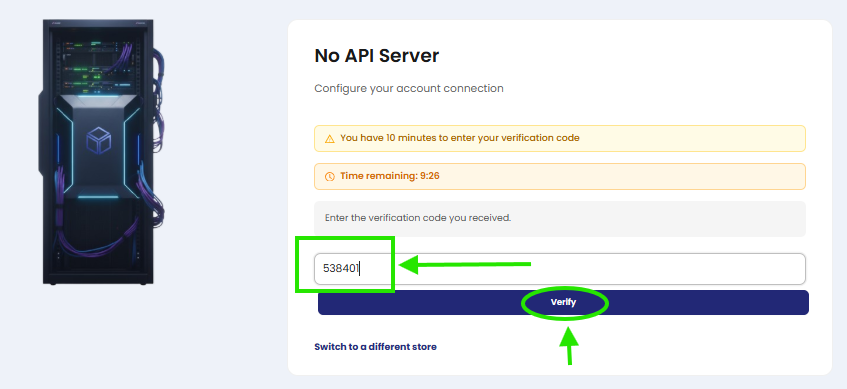
If you are trying to connect an Amazon account, there is one extra field to type which is the OTP code (2FA):
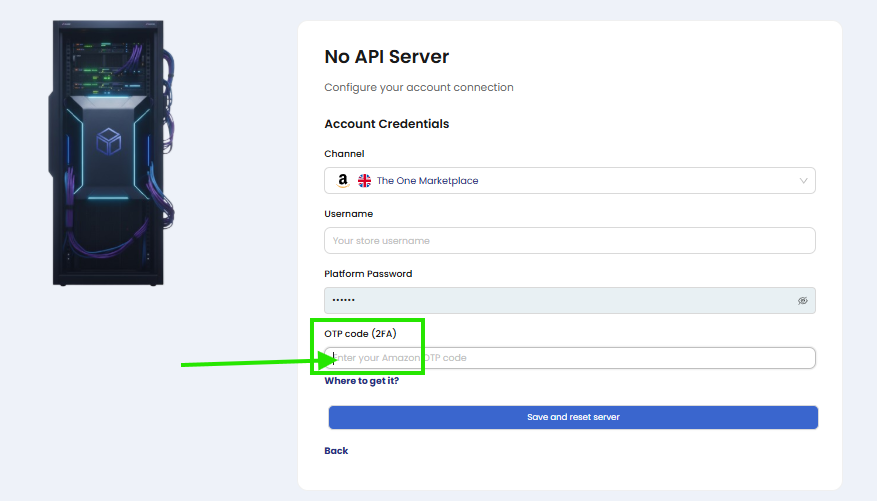
4. Complete any 2FA, OTP, CAPTCHA, or verification steps
The server will ask for the code requested by eBay or Amazon.
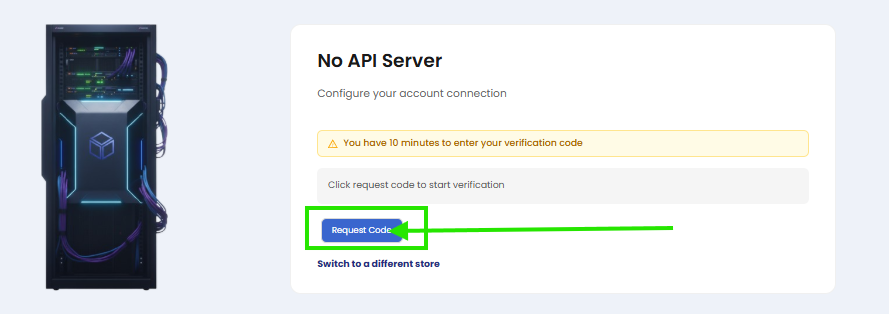
They will send the code to your phone or email, and you have to paste it here:
5. Then just wait
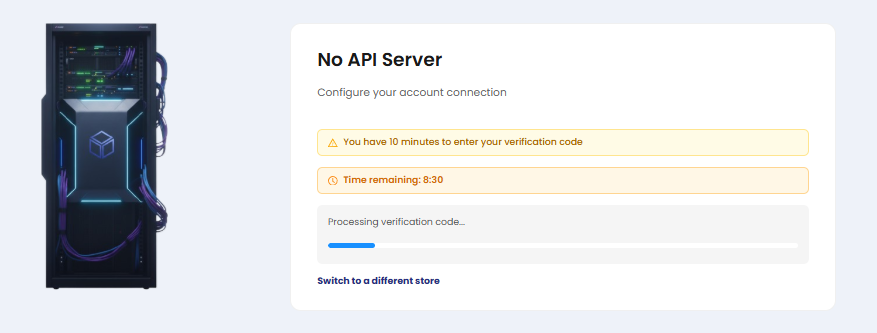
6. Server connection is configured or unconfigured
Connection can be SUCCESSFUL:
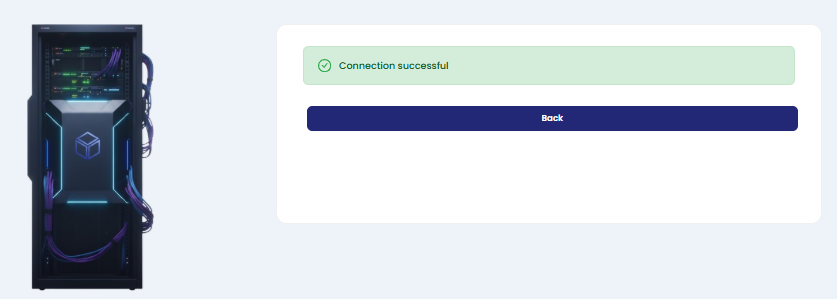
This is how a successful connection looks on the dashboard. It indicates Connected.
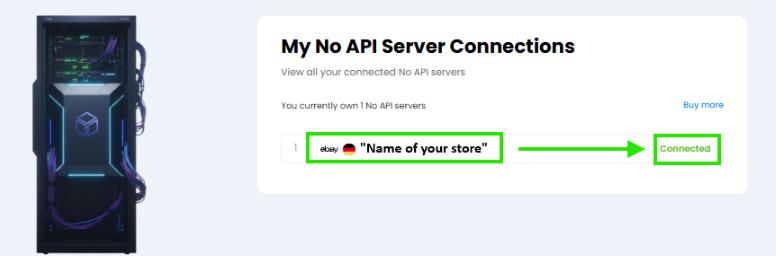
From this point, all No-API tasks run through the server instead of your computer.
Connection can be UNSUCCESSFUL: "Connection failed".
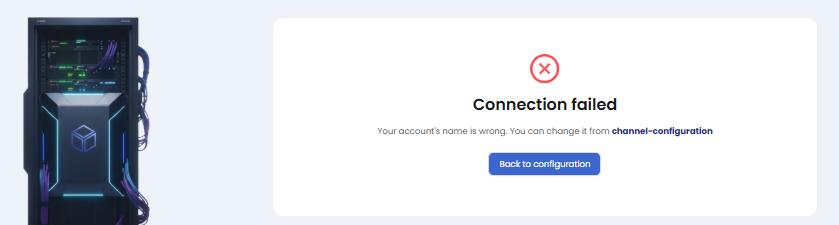
This is how an unsuccessful connection looks on the dashboard. It indicates Not Connected.

2. Benefits of Switching From Local No-API to Server
| Local No-API | No-API Server |
|---|---|
| Requires your PC | Runs in the cloud |
| Browser must stay open | Browser runs on server |
| Session expires often | Long session stability |
| Must stay logged in | Server maintains login |
| Sensitive to sleep mode | Always ON |
Most No-API users eventually migrate to the server for long-term reliability.
Summary
The No-API Server Service is the most stable and efficient way to run No-API stores in Hustle Got Real.
It provides:
- 24/7 automation
- No computer needed
- Fewer disconnections
- Automatic relogins
- Better monitoring
- Faster and more reliable publishing
It is the recommended setup for any user who wants stable automation without relying on a local browser.